Bink Online · Browser puzzle · Independent guide
Boomerang Janitor Guide
First Rooms & Throw Controls
For Room 1, drag from the mop straight toward the three spills on the same horizontal line, then release. That cleared all three in one throw and earned three stars in our desktop run. Room 2 needs an upper-wall bounce; Room 3 takes two routes around the sofa. If your aim looks wrong before release, cancel it. Recall after release still spends the throw.
Covers the author’s itch.io browser opening: three-star routes for Rooms 1–3 and a two-star Room 4 comparison. Desktop Chrome playtest. Bucket rinsing, fragile-object collision penalties, phone gameplay and later rooms are outside this guide. Airy Arcade is independent and unaffiliated with Bink Online.
The game opens on a separate website in a new tab. This page is a guide, with no embedded game.
Read the room before spending a throw
Check the room number, spills left, throws left and Par before aiming. Throws left is your remaining allowance; Par is the efficiency target shown for that room. Room 1 starts with three throws but Par 1. Having enough throws to finish therefore does not mean that using all of them will earn every star.
With a mouse, start the drag at the mop and move toward the target, then release to launch. The opening describes a fixed speed, so use the drag to choose direction. Check the line rather than treating a longer pull as a stronger shot. The examples below use room landmarks instead of screen coordinates, which would change with the size of your game window.
| Action | Author-documented input | Actually used here |
|---|---|---|
| Aim and throw | Mouse or touch: drag toward a target, release | Mouse drag and release; touch untested |
| Keyboard aim | Arrow keys; Shift for fine adjustment | Not play-tested |
| Keyboard throw | Space | Used in Room 1 |
| Cancel before release | Escape, Cancel aim, or return to the launch circle | Escape confirmed without spending a throw; other methods untested |
| End a released throw early | Recall mop | Used in Room 4; no throw refund |
| Start the room over | In-game restart controls | Restart used before comparing routes |
Room 1 — First sweep: keep the three spills aligned
The opening has three spills, three available throws and Par 1. Look along the row from the launch point through all three spills. Drag horizontally toward that row and release. Our successful attempt finished with zero spills, two throws left and no damage; settlement showed one throw used, zero broken objects and three stars.
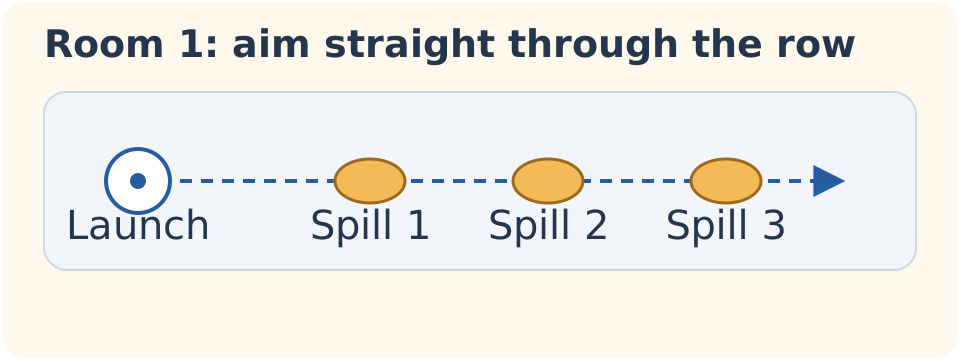
Our earlier off-angle Space throw cleaned only one spill and left two. The useful correction was the direction, not another quick launch. We restarted and aligned the full row before throwing again. If your first shot also leaves two spills, you can continue toward completion, or restart to attempt the one-throw target. Choose according to whether you want to move on or improve the result.
Room 2 — Off the wall: use the upper bounce
This room starts with six spills, three throws and Par 1. Its visible instruction points you toward the top wall, and the dotted preview shows one bounce. Read both parts of that preview: the first leg should collect spills on the way up, while the reflected leg needs to serve the rest of the room. Aiming directly at one isolated spill can miss that larger route.
Show the tested Room 2 route — route spoiler
From the lower-left launch position, aim toward the high central spill and upper wall. In our successful line, the outgoing path passed through the first spill on the left before reaching the upper part of the room. We released once and let the throw resolve. It cleaned all six spills, leaving two throws, with zero broken objects and three stars.
Use those landmarks to compare your preview before release. We are not supplying an exact angle that guarantees the same result in every distributed build. If the room does not match the lower-left start and six-spill layout, check the room identity and author link before applying this route.
Room 3 — Around the sofa: split the job in two
Room 3 begins with twelve spills, four throws and Par 2. The sofa divides the useful space, and the room’s hint suggests trying the upper or lower wall. Here a two-throw finish can meet Par. Do not carry Room 1’s one-throw goal into every room: read the current target before deciding that a second launch has spoiled the run.
Show the two tested sofa routes — route spoilers
First, take the upper route: aim toward the spill above and to the left of the sofa, sending the mop around its upper side. This cleaned eight spills in our run. The counter changed from twelve to four, and the remaining throw allowance changed from four to three. That four-spill remainder is a useful checkpoint before choosing the second direction.
For the second launch, use the lower route through the spill near the bottom middle. It cleared the remaining four, finishing with two throws left. Settlement confirmed two throws used, zero broken objects and three stars. The first pass did not need to clear everything; its value was leaving a remainder the second route could reach within Par.
If your first route leaves a different count, inspect the remaining spill positions before copying the second action. Our eight-then-four split describes a completed example. It does not establish that every slightly different first shot leaves the same cleanup job. Restart if you want to reproduce the example from a fresh twelve-spill room.
Cancel aim and Recall mop have different costs
Before a throw, Escape lets you abandon an aim. In Room 2 we canceled before release, and the room stayed at six spills and three throws; the Cancel aim control disappeared. This is the moment to correct a doubtful preview without spending the room’s allowance. The author also lists the Cancel aim button and returning to the launch circle as cancellation methods, but we did not separately verify them.
Recall applies after launch. In Room 4, we released vertically and recalled early. All six spills remained, while throws left fell from three to two. The return message explained that the homeward trip was recovery only, with no extra cleaning. Recall ended that attempt early; it did not undo the launch or restore the spent throw.
That distinction changes the decision you make. While still aiming, cancel and set a better line. Once released, do not expect Recall to act as an undo button or use the return journey to finish spills you missed. After the mop returns, read the updated counters before deciding whether to continue with the remaining allowance or restart for a cleaner attempt.
A clean room can still miss the Par star
The pause instructions name three star goals: complete the room, meet Par and avoid breaking objects. Room 4 made the distinction visible. After restarting, our first table-directed throw cleaned four of its six spills. A second bottom/right bounce cleared the final two. The room was complete, with zero broken objects, but two throws exceeded Par 1 and the result was two stars.
This was a successful completion, not a three-star Room 4 solution. It shows why “no damage” alone is insufficient. Compare throws used with Par on settlement, rather than treating an empty room as proof of maximum efficiency. We did not observe an actual broken object, so this example establishes the missed-Par difference without claiming a tested breakage penalty or a hidden scoring formula.
Use Try for stars when you want another attempt after completion, or the available restart control when you want a fresh room. Decide what to change first: align a row, include the reflected leg, or reserve the second sofa route. Repeating a direction that already missed your target is less useful than comparing the preview and the spills it actually left behind.
Quick answers when a run goes differently
Why did Room 1 clean only one spill?
Our off-angle attempt did the same. Recheck whether the line runs horizontally through all three spill positions. Restarting and using that aligned route cleared the row in one throw. The one-spill result does not by itself show that the throw needs more power.
Does Recall give a throw back?
No refund occurred in our Room 4 check: three throws became two after release and early recall. Use cancellation before release when your aim is wrong. Recall and cancel belong to different stages of the action.
Will the returning mop clean the spills I missed?
The return message in our run explicitly described recovery without extra cleaning. Plan the outgoing route to do the work. Check the remaining-spill counter after the attempt instead of waiting for the journey home to finish a missed section.
Can I get three stars with two throws?
Yes in our Room 3, whose target was Par 2. Two throws earned three stars there. Our Room 4 also used two throws, but its Par 1 target produced only two stars with no broken objects. Read the target for your current room.
Should I buy a different mop or use a rinse bucket?
The author describes cosmetic mops with equal cleaning ability and rinse buckets as a mechanic. Neither is needed to explain our first three completed routes. We did not test bucket use or a cosmetic purchase, so this guide provides no bucket route or purchase recommendation.
Do these instructions cover phones and every version?
The author documents touch dragging, but our routes were played with desktop Chrome. We have not verified physical phone controls, later contracts or progress after closing the browser. Y8 has a listing with the same attribution; we have not established that its hosted build matches the itch.io version.
Sources and another short puzzle
The Bink Online author page and browser game on itch.io ↗ supplied the published controls and the opening played for this guide on October 28, 2026. The Y8 listing ↗ supports attribution, not a claim of matching builds. The sketch above is our own abstract illustration.
For a different aiming puzzle, try Ricochet Shot. For planning clear directions in a different kind of board, try Arrows. Each has its own rules. Return to all game guides or browse the browser game directory.