Ricochet Shot
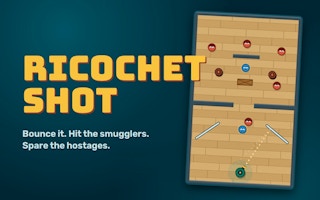
Aim a limited shot at red targets while keeping the blue hostages safe.
- Session
- Flexible short sessions
- Controls
- Drag to aim, then release to fire
- Best for
- Shooter
Bounce a shot through the board
Ricochet Shot
Drag to aim, then release to fire
Play loads a game hosted by GamePix that may show ads and use cookies.
Provided by GamePix. Ads and cookies may load only after you press Play. Read the GamePix Privacy and Cookie Policy.
Check the red targets and blue hostages before aiming.
How to play
How to Play Ricochet Shot
Read the targets, hostages, obstacles, and bullet counter before aiming.
- 01
Start a level and locate every red target and blue hostage on the current board.
- 02
Drag from the cannon to aim and release to shoot, or use Left and Right to aim and Space to fire.
- 03
After the projectile settles, check the remaining bullets and whether a target was removed.
- 04
Re-aim from the new board state; avoid a line that crosses a hostage even if it reaches a target.
About the game
Ricochet Shot
Ricochet Shot asks you to clear the red targets on a compact vertical board without hitting the blue hostages. The opening instructions show a cannon, wooden walls, angled surfaces, crates, and a powder keg. They also explain that a crate can break and a powder keg can explode. Those objects can change the path or consequences of a shot, so the first useful move is to inspect the whole board rather than fire immediately at the closest target.
The first level, First Shot, gives three bullets. Its red target is directly above the cannon. A straight upward shot can clear that opening level with one bullet and produces a three-star result. That simple success teaches the most important loop: identify a safe line, aim, release or fire, then compare the remaining bullets with the targets left. Later layouts can put walls or hostages between the cannon and a red target, which makes the angle and likely rebound more important than the apparent distance.
Use the level board itself as the authority for each attempt. The instructions describe ricochets and hazards, but an angled shot can be hard to predict until you watch a projectile travel. If you lose a bullet without clearing a target, inspect where it struck before adjusting. A safe miss can still show which surface sends the next shot toward or away from a hostage. The goal is a clear board, not simply the most dramatic bounce.
Controls
Controls for Ricochet Shot
- Mouse or touch drag
- Adjust the cannon aim; release to take the shot when the trajectory is acceptable.
- Left and Right arrows
- Change the aim from the keyboard in small steps.
- Space
- Fire the current aim from the keyboard.
- M
- Toggle the game music if you prefer a quieter attempt.
Useful strategy
Plan around the blue markers
- Treat every blue hostage as a no-hit zone while choosing a path to the red targets.
- Compare your intended path with the bullet count; a wasteful first shot can leave too few attempts for the rest of the board.
- Aim for a controlled rebound from one visible surface rather than hoping several bounces will eventually reach a target.
- If the shot breaks a crate or triggers another object, reassess the changed board before firing again.
- Watch the projectile travel and use its actual collision point to correct your next angle.
Read the board as a route, not a picture
Begin by naming the red targets that must be cleared. Then mark each blue hostage as a position your projectile must avoid. The opening instructions use color to establish this distinction, and it remains more useful than guessing from a character illustration. A red target directly above the cannon may allow a straight shot; a red target behind a wall calls for a different route. Treat a shot as a path through space, with possible turns at visible angled surfaces.
Next, consider what each obstacle does to that path. A solid surface may reflect or stop the projectile, while the instructions say a crate can break and a powder keg can explode. Do not assume those reactions are helpful in every position. If a crate sits between you and a target, breaking it could clear a path, but it also costs a bullet and may leave the target untouched. A powder keg might affect an area, so inspect nearby blue hostages before treating it as a shortcut.
Finally, read the bullet counter before committing. The first level allows three rounds and can be cleared with one. That does not mean every later level requires a perfect one-shot solution. It means the game makes ammunition a visible constraint. When a board offers several possible target orders, prefer an opening that preserves safe options for later shots instead of one that consumes a bullet merely because it is easy to line up.
Use the cannon controls deliberately
The clearest starting method is to drag to aim and release to fire. Begin the gesture on the cannon area, move slowly enough to see the direction change, and release only when your line seems safe. On a touch screen, a finger may cover part of the cannon or lower board. Pause before release and look above the finger for the targets and hostage positions. Avoid a fast swipe whose final angle you did not inspect.
The keyboard offers another route: Left and Right to adjust, then Space to fire. It is useful when a small angle correction matters or a mouse drag is imprecise. Make one small adjustment, check the cannon direction, and repeat only if the path still points away from the intended surface. Keyboard instructions appear in the game's opening panel, so there is no need to guess other keys. M controls music, not the projectile, and is optional.
After firing, wait for the shot to finish before making another input. A projectile can bounce, strike a crate, or hit a target after it passes the first visible obstacle. Clicking again too early risks spending a second bullet without understanding the first one. Read the updated target state and counter together. If the red target remains, the shot was not a clear even if an animation looked impressive.
Choose safer rebounds
A ricochet is useful only when its outgoing direction reaches a needed target while missing blue hostages. Imagine the projectile touching a surface and leaving it at a new angle. If the route toward a hostage is more direct than the route toward a target, a different surface or a shallower angle may be safer. Work backward from the red marker: which visible wall could send a projectile into it, and can the cannon reach that wall without crossing blue?
One rebound is easier to reason about than a chain of several. Start with the first collision you can predict. If the actual projectile leaves at a surprising direction, use that observation to refine the next attempt rather than applying a memorized trick from another board. The geometry can change when a crate breaks, so a route that was blocked before may open later. Check the current board, not the picture you remember from the start of the level.
The powder keg offers a different kind of interaction. The instructions say it explodes, but the useful question is where that effect reaches on this board. Do not fire at it only because it is marked as interactive. If a hostage is near it, a direct red-target route may be preferable. If the keg appears isolated from blue and close to several red positions, it may be worth evaluating, but a player should still confirm the outcome before relying on it again.
Recover when an attempt goes wrong
If a shot misses everything, identify its first collision. Was the cannon aimed too far left or right? Did the projectile strike a wall before the intended corner? The answer suggests a specific correction. A small change can be more informative than swinging the aim to the opposite side. The bullet counter tells you the cost of that experiment, so do not repeat the same angle without a reason.
If you hit a blue hostage, the likely mistake is treating the target as the only relevant object. Before retrying, draw the whole route through the board, including the area after a rebound. An apparently harmless approach to a wall can emerge toward blue. If a crate breaks but the red target remains, ask whether the newly open space creates a direct follow-up shot; the broken crate may have changed the board even though it did not finish the level.
If you run low on bullets, narrow your choice to paths that can reach a remaining red marker. Firing merely to see what happens is less useful when only one round is left. On the first board, the direct upward route is an example of a shot with a clear target and little ambiguity. Carry that discipline forward: locate the target, inspect the intervening space, and commit only when the expected route is understandable.
Build a repeatable level routine
At the start of a new level, count red targets and blue hostages, note the ammunition, then find the most obvious safe target. Sometimes that is a direct line. Sometimes a wall must redirect the shot. Do not let a familiar level theme replace this scan; the position of one hostage can make yesterday's angle unsafe. A short board-reading pause often saves more time than restarting after an avoidable hit.
After every shot, make a three-part check. First, did the target state change? Second, how many bullets remain? Third, did an obstacle change shape or disappear? These answers determine whether you should repeat the same plan, adjust the angle, or choose a different target. A result screen with three stars confirms a level clear, but it is the visible board and counter that guide the shot before that result appears.
Use a cleared easy level as a control example rather than a universal recipe. First Shot shows that a single direct hit can finish a board with three bullets available. More crowded boards should be solved from their own layout. Keep the focus on clear targets and safe hostages. A spectacular bounce is only a good move when it advances that task without creating an unnecessary risk.
Quick answers
Ricochet Shot FAQ
What counts as a successful shot?
A red target must be cleared; a changing animation alone is not enough. Watch the target and bullet counter after the projectile stops.
Can I use the keyboard?
Yes. The opening panel lists Left and Right for aiming, Space for shooting, and M for music.
Why should I avoid the blue figures?
The opening instructions identify the blue figures as hostages to spare. Choose a path that reaches red targets without crossing them.
Game information
Game details
This game runs in the official GamePix publisher player. The external game may use cookies or show advertising under GamePix terms.
- Distributor and host
- GamePix
More about this game
Keep the break going