Tidewell
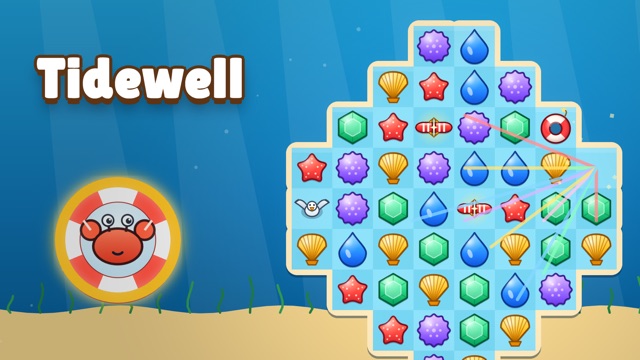
Swap neighboring sea treasures to match three and reduce the starfish target before moves run out.
- Session
- Short match-3 levels
- Controls
- Drag one treasure onto a neighboring space
- Best for
- Puzzle
Landscape gives you more room
Clear the sea-star goal
Tidewell
Drag one treasure onto a neighboring space
Play loads a game hosted by Playgama that may show ads and use cookies.
Provided by Playgama. Ads and cookies may load only after you press Play. Read the Playgama Privacy and Cookie Policy.
Check the starfish goal and remaining moves.
How to play
How to Play Tidewell
Use a neighboring swap to line up matching sea pieces, then check whether the goal changed.
- 01
Press Play and locate the move counter and GOALS panel before touching the board.
- 02
Find the highlighted opening starfish and swipe it toward the adjacent shell as instructed.
- 03
Let the match and any falling pieces finish before choosing another swap.
- 04
Compare the remaining moves and starfish target, then plan the next goal-serving move.
About the game
Tidewell
Tidewell is an ocean-themed match-3 game about making each swap count. A board of shells, water drops, green gems, and red starfish sits beside a move counter and a level goal. The opening level starts with 18 moves and a target of 12 red starfish. The useful question is therefore not simply whether a swap makes something disappear, but whether it advances the target before those moves are gone.
The tutorial points to a red starfish immediately above a shell and asks you to swipe to swap. Moving that starfish down made a row of matching pieces. The move counter changed from 18 to 17, while the displayed starfish goal fell from 12 to 6 as the board resolved. That is one opening outcome, not a fixed result for every replay; falling pieces and subsequent matches can alter what appears after a move.
You can start by playing the visible tutorial rather than searching for an advanced combination. Look at the left-side GOALS panel, then identify a neighboring exchange that makes a line of at least three identical pieces. Pause after the animation and reread both counters. The game also mentions harbor restoration and Harbor Pal powers. Follow the current level before relying on an ability you have not unlocked.
Controls
Controls for Tidewell
- Drag or swipe a sea piece to a neighboring cell
- Attempt a match-making exchange.
- Pause button
- Stop and inspect the current level before resuming.
Useful strategy
Make the next move useful
- Read the target icon first; a clear of another color may leave the required starfish count unchanged.
- Check both the immediate match and what can fall into the empty spaces afterward.
- Make one swap, let the animation settle, and only then count the new board.
- Keep several moves in reserve when the goal still needs multiple separate clears.
Read the goal before looking for a match
A match-3 board can offer several possible lines at once. In Tidewell, the left panel tells you which kind of piece matters for the current level. The first goal is a red starfish icon with 12 remaining. That gives you a concrete test for a proposed swap: will it remove starfish directly, or create space likely to bring them into a later match? A move that only clears shells may still change the board, but it has not automatically completed the stated task.
The move counter gives that test its urgency. Eighteen moves were visible at the beginning of Level 1. When the highlighted starfish was moved, the count became 17. Treat each exchange as a budget decision. If two swaps are available, prefer the one with a clearer route to the current target rather than the one with a prettier animation. This is especially useful when the board contains many colors and your eyes keep finding easy but irrelevant threes.
The goal may change on a later level. Recheck the target icon and move count at the start of each board instead of memorizing the first layout.
Make a deliberate neighboring swap
The opening tutorial says to swipe and line up three of a kind. It highlights two vertically adjacent cells: a red starfish above a shell. Dragging the starfish downward produced a valid match. The important detail is adjacency. You are not selecting three pieces independently or drawing a line across the board; you exchange one piece with its immediate neighbor and let the resulting arrangement decide whether a line forms.
Before dragging, trace the destination row or column with your eyes. Imagine the piece after it has moved. Are there now three same-colored symbols in a continuous line? If not, look for another neighbor. This small mental preview is faster than making random attempts, and it is especially helpful on a crowded board where a shell or water drop can look similar at a glance. Work with the symbols and their positions, not only their colors.
Start near the center of a tile, move toward its neighbor, and release. On desktop, click-and-drag the same way. If nothing moves, check that the player is active and the tutorial has loaded. One clear exchange is easier to assess than several rapid swipes.
Wait for the board to resolve
The first tutorial exchange does more than shift two icons. Matching pieces cleared, new pieces fell, and the goal number dropped from 12 to 6 while the move counter spent only one move. That difference suggests the board can resolve more than the first line you noticed. The exact follow-up pattern depends on the pieces that arrive in your run, so do not promise yourself a six-starfish reduction every time you repeat the same-looking gesture.
After a swap, watch the entire board rather than tapping again during the effect. A line can clear near the middle while another match forms above it. If you start a new gesture before the animation settles, you may misread which action reduced the target. Waiting a moment gives you a clean before-and-after comparison: how many moves remain, how many goal pieces remain, and where are the useful pieces now?
An incidental cascade is welcome, but it is not something you can fully control from one early screenshot. Plan around a match you can see. Treat a second clear as a bonus until you understand the current layout. That keeps the strategy grounded in visible choices instead of assuming every falling piece will land exactly where you want.
Spend the move budget on the target
A limited move pool rewards a different rhythm from an endless matching game. Scan the board, identify one or two target-serving swaps, then commit to one. If a starfish is one neighbor away from joining a pair, that is a stronger candidate than clearing an unrelated group at the far edge. A non-target match can still be useful when it opens a path, but you should be able to explain that path before spending a move.
Notice where a clear will create space. Pieces above the empty cells may fall into new positions, making a formerly separated pair closer together. You cannot know every outcome without seeing what enters from the top, yet you can often tell whether the move opens a column next to the target. This is a modest, useful prediction rather than a claim that a particular cascade is guaranteed.
When the remaining move count gets low, narrow your search. Stop chasing large-looking combinations that leave the goal untouched. Ask what the shortest visible route is to remove one more group of the target symbol. If no direct match is available, choose an exchange that changes the area around those symbols, then reassess after it resolves. Reassessment is part of the plan, not a sign that the first move failed.
Recover from common early mistakes
The easiest error is to look at a match and forget the goal. The first level has several icon types; a line of blue drops or shells can be visually satisfying without reducing the red starfish target. If the goal number does not move, inspect which pieces you actually cleared. A useful next step is to return to the goal panel, find those pieces on the refreshed board, and plan around their positions.
Another mistake is acting while pieces are falling. The board can look briefly empty or shifted during an animation. Wait until symbols settle before counting potential matches. If a drag seems ignored, check whether the player has focus, whether the two cells were neighbors, and whether the gesture began inside a tile. One precise gesture is a better diagnostic than several rapid swipes.
Do not assume a slow or difficult board requires a paid shortcut. The opening starfish swap does not require a Harbor Pal power. Learn what an ordinary swap accomplishes first. If a later level introduces a helper, read its in-game label and cost before using it. Do not assume a refill is free or that a helper is necessary; read its in-game label and cost first.
Use a repeatable board-reading routine
A compact routine makes a match-3 level much easier to read: goal, moves, candidate swap, result. First say what you are collecting and how many are left. Then note your remaining moves. Next identify a neighboring exchange that forms a visible line or improves access to the goal. Finally, let the board resolve and compare the two counters. This cycle keeps the level focused on the player task rather than on random tapping.
The opening is a good practice example because the UI provides clear numbers. Start at 12 starfish and 18 moves, make the highlighted downward swap, and watch the new values. After that swap, the counters can show 6 starfish and 17 moves. Your board may evolve differently after the clear. The lesson is how to measure whether a move worked, not a fixed sequence that wins every level.
If you want another kind of match puzzle after Tidewell, the related games below offer different visual rules. Keep the same habit of reading the current target, because a familiar swap gesture does not mean the goal system is identical. On Tidewell itself, continue one board at a time, letting the current counters guide the next decision. That is enough to make the first session purposeful without pretending the later harbor content has already been tested.
Quick answers
Tidewell FAQ
How do I make a match?
Drag one piece into a neighboring cell so the resulting row or column lines up at least three of one kind.
What should I watch after a swap?
Check the remaining moves and the goal count after all clear and falling animations finish.
Are Harbor Pal powers needed at the start?
The first starfish swap works without a power. If a later level introduces one, read its in-game label and cost before using it.
Game information
Game details
Tidewell runs in Playgama’s official player, which may use cookies or show advertising.
- Developer
- Azura Works
- Distributor and host
- Playgama
More about this game
Keep the break going
Similar games

Make every swap count
Glintwell Match
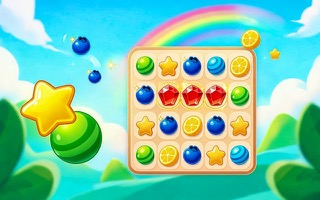
Swap adjacent gems to make groups of three and reach the score target with limited moves.
Swap sweets and reach the goal
Candy Match
Swap adjacent candies, build matches, and complete each score and collection target within the move limit.