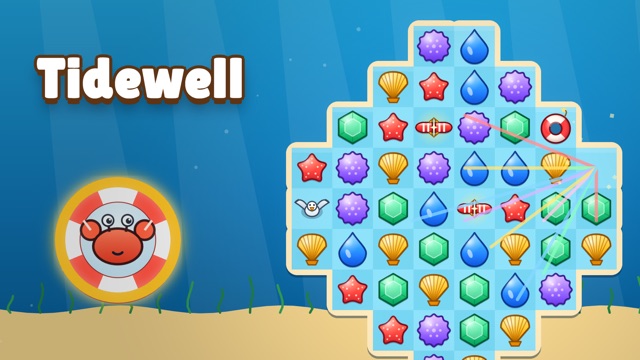
Glintwell Match
Swap adjacent gems to make groups of three and reach the score target with limited moves.
- Session
- Short sessions
- Controls
- Drag one piece to an adjacent cell
- Best for
- Match 3

Make every swap count
Glintwell Match
Drag one piece to an adjacent cell
Play loads a game hosted by GamePix that may show ads and use cookies.
Provided by GamePix. Ads and cookies may load only after you press Play. Read the GamePix Privacy and Cookie Policy.
Read the level target and remaining moves before touching the board.
How to play
How to Play Glintwell Match
Read the score target and remaining move count before your first swap.
- 01
Scan rows and columns for two same-color gems with a third one an adjacent swap away.
- 02
Drag one gem into a neighboring cell and confirm a group of at least three clears.
- 03
Observe the score, remaining moves, and new pieces after the board settles.
- 04
Compare another reliable match with any four- or five-piece opportunity.
- 05
Repeat until the visible target is met or the move budget expires.
About the game
What to do in Glintwell Match
Glintwell Match is a match-three puzzle whose opening gives you a clear target and a limited move supply. The tested first level displayed a goal of 2,000 points and twelve moves. Dragging one red gem down to the adjacent cell made a red match; the score rose from zero to 330 and the move counter fell to eleven. That single swap verifies the core interaction and the cost of a move. It does not prove how every special piece or later board behaves.
The official listing explains that groups of three clear, while matches of four or five can create special effects. The useful player task is to balance immediate points against future board shape. A move that clears three may open a valuable follow-up, while a more obvious match can leave isolated colors. Start with what the current board shows: adjacent swaps, visible lines, target score, and moves remaining. Treat any chain reaction as a result to inspect, not a guaranteed plan.
Controls
Controls for Glintwell Match
- Drag an adjacent gem
- Swap two neighboring pieces to form a row or column of matching colors.
- Score and move display
- Track progress toward the current target and the cost of each swap.
- Board view
- Inspect pieces after a clear before committing the next move.
Useful strategy
Useful decisions during a short run
- Search for nearly complete lines before dragging a gem.
- Count the move you will spend even if a swap looks promising.
- Look one move ahead after a clear because falling pieces can create a new line.
- A four-piece match may be useful, but do not sacrifice a reliable score gain without a reason.
- When the score target is close, favor a clear you can see over a speculative cascade.
- If a drag fails to clear pieces, pause and recheck that the swap was adjacent and made a valid group.
Find a match before touching the board
The first step in a match-three board is a visual scan. Look for pairs of the same color, then ask whether a third matching gem sits one cell away from either end. Check both horizontal and vertical lines. A nearby gem can often slide into a gap, but it must be adjacent to the piece you swap. This simple test prevents wasted motion and makes the first move intentional rather than a drag toward the brightest piece.
The board can contain several possible swaps. Compare them by location and what they may open. A match low on the board may cause more pieces to fall through changed columns, while a match near the top may have a more limited local effect. That is a possibility, not a guarantee of a cascade; use the actual layout to decide. If one move is clearly valid and another depends on an uncertain drop, take the reliable clear while learning the game's behavior.
In the observed first level, dragging a red gem downward into an adjacent cell cleared a red group and changed the score and moves. That provides a practical confirmation to seek on your own attempt: pieces disappear or move, points increase, and the move display changes. If none of those occur, do not assume the game accepted your drag. Try a clearly adjacent swap and inspect the board again before basing a strategy on an invisible input.
Treat twelve moves as a budget
A score target gives you a destination, while the move counter tells you how much room you have to reach it. In the tested opening, the board asked for 2,000 points in twelve moves. After a successful red match, the score was 330 and eleven moves remained. That result tells you that the first move made progress, but it does not prescribe how many points all future matches will award. Watch the score after each swap rather than multiplying one result into a guaranteed solution.
A useful mid-level check is to compare the gap to the target with the moves remaining. If you are far behind with few moves left, look for larger matches or setups that can produce more than one clear. If you are close to the target, a small reliable line may be the safer finish. This is not a rigid formula because special pieces and cascades can change the scoring. It is a way to keep each move connected to the actual objective.
Avoid spending a move merely to rearrange colors unless the game shows a clear reason. An adjacent swap that creates no group may be rejected or may still have a cost depending on the current rules, and the short test did not establish that behavior. Prefer a visible match. When an attempted drag does not produce a clear, inspect the move counter before deciding whether it was a free invalid swap or a costly one.
Reassess after pieces clear
A successful match changes the board, which means the plan you formed before the swap may be obsolete. Let the pieces finish moving, then scan the affected rows and columns again. A gap may have pulled another matching color into place; a promising pair may also have disappeared. Continuing to drag based on the old arrangement is a common source of errors. Treat every completed clear as a new small puzzle with the same overall score goal.
Look for the connection between a match and the next one. If two nearby colors can be lined up by clearing a blocking row, a modest first move may set up a stronger second move. But avoid inventing a chain that depends on unknown falling colors. The most dependable setup uses pieces already visible. Distinguish an observed board pattern from a hopeful cascade. That distinction becomes especially important when only a few moves remain.
The official listing mentions special effects for matches of four or five. If the board presents one, compare its immediate value with your target and the space it will alter. A special piece may be powerful, but a route to create it can take several moves. In a short first level, a straightforward three-match that advances the score may be better than a complicated setup. Use the move counter and board state to decide, then learn from the result.
Correct an ineffective swap
If a drag does nothing, check the physical move first. Did the piece land in a neighboring cell, or did it cross more than one space? Match-three controls generally act on adjacent pieces, and the observed action was a single-cell downward drag. Next, check the resulting row and column. Three same-color pieces must align; a diagonal cluster or separated pair is not the same thing. This diagnosis is more useful than repeating the exact drag harder.
If the swap clears pieces but the score still falls short, do not rush into random follow-ups. Read the new move count, identify the largest visible opportunity, and compare it with the simplest safe line. A few deliberate seconds can prevent spending the last move on a tiny clear when a more productive one was available. The game is about selecting among visible possibilities, not making every piece move as fast as possible.
A failed level can be replayed as a small experiment. Remember the opening swap that worked, then change the point where your score growth slowed. You might choose a different column, preserve a useful color pair, or take a larger match when it appears. The guide verifies one first-level match and uses the official rules for larger matches; it does not promise that a fixed sequence solves every randomized or later board.
Quick answers
Glintwell Match FAQ
What is the basic rule?
Swap adjacent pieces to line up at least three of the same kind; the official listing describes larger matches and special effects.
Did the first tested swap work?
Yes. One red swap cleared a group, raised the score from zero to 330, and reduced the move count from twelve to eleven.
Should I always aim for five?
No. Larger matches can help, but compare the setup cost with the remaining moves and target score.
Why did my drag appear to do nothing?
Check adjacency and whether three matching pieces lined up, then look at the move counter to see whether the input registered.
Game information
Game details
Glintwell Match runs in the official GamePix-hosted player. Airy Arcade does not host its game code.
- Distributor and host
- GamePix
More about this game
Keep the break going