Pixelwar
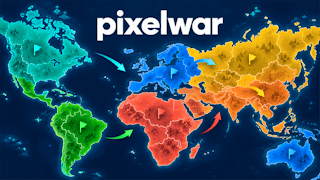
Start a territory, reserve troops, then attack adjacent open land in a practice battle.
- Session
- Short sessions
- Controls
- Click land to choose a start or target
- Best for
- Tactics
Expand one tile at a time
Pixelwar
Click land to choose a start or target
Play loads a game hosted by GamePix that may show ads and use cookies.
Provided by GamePix. Ads and cookies may load only after you press Play. Read the GamePix Privacy and Cookie Policy.
Choose Single player and start the guided tutorial or a practice map.
How to play
How to Play Pixelwar
Choose Single player in the lobby and open the tutorial or a practice map.
- 01
Select land inside the marked starting ring to establish a territory.
- 02
Read the reserve and set an attack share, keeping some troops behind.
- 03
Click a grey land tile adjacent to your territory.
- 04
Press the Attack icon on that selected tile and watch the order resolve.
- 05
Compare the new border and reserve before choosing another adjacent target.
About the game
What to do in Pixelwar
Pixelwar is a territory game with a guest-accessible single-player area as well as a multiplayer tab. The tested route stayed in the single-player tutorial: after choosing a starting location, a small green territory appeared with a reserve of 517 and four practice bots on the board. Clicking the plus control changed the attack share from 25% to 30%. Selecting adjacent grey land and pressing its Attack icon sent troops; the reserve fell to 362, and the green border expanded. Those on-screen changes confirm an actual territory action, beyond merely opening a lobby.
The official page describes expansion by clicking adjacent land and choosing an attack percentage. For an initial session, single-player practice is the clearest place to learn without requiring a new account or competing with other people. The tutorial pauses at decisions and marks a target, so you can observe the relationship between reserve, share, target, and result. The exact numbers in the tested board are an example, not universal troop costs. Read the counters in your own session.
Controls
Controls for Pixelwar
- Land click
- Choose a starting position or an adjacent target tile.
- Attack-share control
- Set how much of the current reserve to send.
- Attack icon
- Confirm an order against the selected neighboring land.
- Single-player tab
- Enter the practice route without needing a new account.
Useful strategy
Useful decisions during a short run
- Expand into connected open land before attempting a heavily defended position.
- Keep a reserve rather than sending every troop from an exposed border.
- Read the target after clicking it; a selection is not yet an attack order.
- Watch the border color change to confirm that land was captured.
- Use the tutorial pause to compare a share change with the displayed troop count.
- Reassess after every order because income, reserve, and neighboring threats may change.
Start where the rules can be observed
The lobby offers multiplayer and single-player routes. For a first attempt, choose Single player and use the tutorial or practice map. The tested tutorial explained each action and paused before an order, which makes it easier to see what your click does. A guest can reach this path without creating an account. You do not need to join a live match to learn the basic territory loop, and an online leaderboard is not evidence that your own move succeeded.
The opening asks you to choose land inside a ring. Look for a location with nearby open tiles rather than one surrounded immediately by opponents. In the tested tutorial the marked ring made the decision straightforward; clicking within it created the first green territory and brought up reserve, leaderboard, percentage, and attack controls. This is a founding step. It gives you a base from which only connected targets are useful. A distant unconnected click is not the same as a valid expansion.
Take a moment to read the board after your start. Identify your color, the closest grey land, and the nearby opposing colors. The tutorial used bots and a paused state, so there was no need to race. In a regular practice map the pace may differ; use the visible counters and map state. The aim of the first round is not to conquer everything quickly. It is to send one order and recognize its effect on land and troops.
Distinguish selection from the order
Clicking an adjacent land tile selects it. In the tested step, that click produced a highlighted Attack icon over the grey land, but the border had not yet changed. Pressing the icon sent the order. Watch for this two-step sequence: target, then confirmation. If the icon does not appear, inspect whether the tile is really adjacent to your territory or whether another overlay is active. Repeatedly clicking the map without understanding the selected state makes it hard to tell what happened.
After pressing Attack, watch the border rather than just the troop animation. The tutorial described captured land becoming your color, and the observed green area did expand while the percentage and income display changed. Those are meaningful results. A click on a target without a changed border would not prove capture. If an order fails, compare the target strength and your sent share before trying again. The first useful question is whether the attack had enough force for that tile.
Open grey land and enemy-colored land are different targets. The tested expansion went into grey land next to the initial territory; it did not verify combat against a strong opposing base. Use the same selection and confirmation logic for later actions, but do not assume the same troop share will win against a bot. Read the displayed target and current board. A conservative expansion can create income and space while leaving you a reserve for more demanding borders.
Keep the next border in mind
Every captured tile changes what you touch. A new strip of territory may bring you nearer to an opponent, increasing both opportunity and exposure. Before attacking the next tile, scan the new border. Which neighbor is open? Which has an opponent's color or a visible strength number? Is your reserve growing or shrinking? This short check stops a common early failure: expanding quickly into land that cannot be held with the troops left behind.
If the map offers several empty directions, consider the one that creates room without surrounding you with enemies. A narrow extension can reach valuable space but may leave a long exposed edge; a compact cluster may be easier to defend. The interface will not make every strategic tradeoff explicit. Use the colored territory, troop values, and adjacency to reason about it. The official listing's advice to choose open starting land supports this approach, but the exact best location varies by map.
When a practice attempt goes poorly, return to a specific decision. Was the start crowded, the share too high, or the target too ambitious? Retry with one change so the result teaches you something. The verified tutorial sequence establishes a safe baseline: start in marked land, choose a moderate share, select adjacent grey land, press Attack, confirm a border change. Master that before treating multiplayer rankings or large-map victories as a goal.
Quick answers
Pixelwar FAQ
Can I practice without an account?
The tested lobby allowed guest access to Single player and its tutorial; no new account was used.
Does clicking land attack immediately?
In the tested tutorial, clicking adjacent land selected it and showed an Attack icon. Pressing that icon sent the order.
What did the first expansion show?
The green border grew and the reserve decreased after an attack on adjacent grey land.
Is 30% always the right share?
No. Thirty percent was the tested tutorial setting after one plus click; choose a share based on the current target and reserve.
Game information
Game details
Pixelwar runs in the official GamePix-hosted player. Airy Arcade does not host its game code.
- Distributor and host
- GamePix
More about this game
Keep the break going