Braveward
Raise guilds, hire heroes, and prepare a compact kingdom to survive the night.
- Session
- Short timed strategy runs
- Controls
- Click or tap Build and a building type
- Best for
- Management
Landscape gives you more room
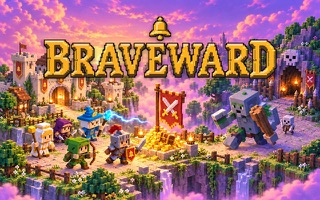
Build before the horde arrives
Braveward
Click or tap Build and a building type
Play loads a game hosted by GamePix that may show ads and use cookies.
Provided by GamePix. Ads and cookies may load only after you press Play. Read the GamePix Privacy and Cookie Policy.
Use the dawn phase to place a guild beside the castle.
How to play
How to Play Braveward
Use each daylight phase to build a functional settlement, recruit the right help, and prepare routes and rewards before enemies reach the castle.
- 01
Begin the day and read the phase name, timer, and current coin total before opening any menu. Dawn is the safe preparation period, so use it to establish the first working guild.
- 02
Press Build, choose the Warriors Guild during the opening tutorial, and select a valid open tile beside the castle. Placement spends coins immediately, so confirm the cost and position first.
- 03
Wait for construction to finish, select the guild, and hire a warrior. A building is only infrastructure; the hired hero is what turns it into active defense.
- 04
Use later income for another role, a supporting building, or a bounty only when the first defensive need is covered. Keep some coins available if the next phase may reveal a more urgent problem.
- 05
Watch the phase bells and the countdown. Before night, scan the whole visible approach, confirm that heroes can reach useful routes, and avoid starting a purchase that cannot contribute in time.
About the game
A timed kingdom plan built one useful decision at a time
Braveward starts you as the monarch of a small castle with limited coins, limited map space, and a clock that keeps moving through the day. During dawn, the first job is practical: open the Build menu, choose a guild, and place it on a valid square beside the castle. A completed guild lets you hire a hero. Later phases introduce more demands, so every early purchase must help the kingdom survive rather than merely make the settlement look busy.
The game combines town planning with preparation for automatic conflict. Heroes choose their own paths, which means the player shapes their chances through buildings, hiring, and bounties instead of steering every sword swing. The top bar shows the current phase, time remaining, and coins. The bottom action bar exposes spending choices. Reading those two areas together is the core skill: decide what the kingdom needs, confirm that it fits the budget, and act while the phase still gives you time.
Controls
Controls for Braveward
- Mouse
- Click menus, buildings, hire actions, bounties, and open map tiles.
- Touch
- Tap the same interface controls and map tiles; use deliberate taps so a costly placement is not accidental.
Useful strategy
Braveward tips for more reliable runs
- Build for a job, not for symmetry. The first guild and hero matter more than a decorative layout.
- Read every cost before selecting a map tile because construction immediately reduces the coin total.
- Keep paths around the castle understandable. A crowded cluster can make it harder to see threats and active heroes.
- Treat the phase timer as a deadline for useful preparation, not as a reason to spend every coin quickly.
- When a new option appears, ask whether it adds damage, healing, income, scouting, or route control to the current plan.
- Place bounties where they guide heroes toward a real problem. A reward in the wrong area can pull attention away from the castle.
- Pause and zoom mentally across the map after construction finishes; the best next purchase may have changed.
- If a run fails, identify the first missing function: too few heroes, weak income, poor positioning, or late spending.
Read the day as a sequence of deadlines
The day is divided into phases, and the phase display is more than decoration. It tells you what kind of decision still has time to matter. Dawn favors construction and recruitment because no enemies are present yet. A later purchase has less time to finish or influence the next confrontation. Before opening a menu, look at the phase, the remaining time, and the bell markers so you know whether you are planning ahead or reacting to a deadline.
Use a short phase routine. First scan the map for new threats or unfinished work. Then check coins and identify one missing function. Finally choose the smallest purchase that answers that need. This order prevents the build menu from deciding the strategy for you. When the clock becomes short, stop browsing optional choices and confirm that the defenses already paid for are in place and able to operate.
A timer can encourage rushed clicks, but fast spending is not the same as good preparation. If the settlement already covers the current need, keeping coins for the next phase can be stronger than adding a weak building. The useful question is whether a purchase changes the next encounter. If it will finish too late, block a route, or leave no money for a hero, save the resources.
Connect every building to a recruit or service
A guild creates access to a hero type, but it does not replace the hero. In the opening tutorial, completing the Warriors Guild is only the first half of the task; selecting it and hiring the warrior completes the defensive loop. Apply that same logic to later structures. Before placing one, know what action becomes available afterward and reserve enough coins to use it.
Map position also affects clarity. Buildings near the castle are easy to monitor, but packing every tile tightly can hide paths and make later placement awkward. Leave recognizable lanes and open areas. A readable settlement helps you notice where heroes travel, where enemies approach, and where another guild or utility building can fit without creating a cramped center.
When several guild choices are available, recruit for coverage. A second copy of the same role may improve a strong point, while a different role may repair a weakness. Compare the next threat with the heroes already active. The correct mix is the one that gives the kingdom a practical answer, not the one that unlocks the most menu icons.
Give every coin a near-term purpose
Coins are a shared limit across buildings, heroes, and other actions. A cheap building can still be expensive if it prevents a necessary hire. Plan purchases as pairs: structure plus the action it enables. Check the total against the current balance before committing. This avoids a common failure where the map contains several buildings but lacks enough active defenders to use them.
A small reserve is valuable when the next phase is uncertain. It lets you respond to a newly visible route or finish a hire after construction. The reserve does not need to remain untouched forever; it simply keeps one option open. Spend it when the map gives a clear reason, rather than because the coin counter looks unused.
After a failed defense, work backward through the spending order. If the first hero arrived late, the opening build was too slow or too costly. If heroes were present but in the wrong area, placement or bounties were the problem. If the defense worked early and collapsed later, the economy may have stopped scaling. Change the earliest weak decision first.
Shape hero behavior through preparation
Braveward states that heroes choose their own path. That makes indirect control central to the game. Buildings determine which roles exist, placement changes where those roles begin, and bounties can influence what deserves attention. You are designing useful incentives and starting conditions instead of issuing constant movement orders.
Before posting a bounty, compare the target with the castle route. A reward is useful when it concentrates heroes on a threat that would otherwise be ignored. It is harmful when it draws several heroes away from a more dangerous approach. Watch the result of each bounty long enough to learn how strongly it changes behavior before adding another.
Because movement is partly autonomous, avoid plans that require perfect timing from one unit. Redundancy and clear routes make the defense more reliable. If a hero takes an unexpected path, the kingdom should still have another useful answer. Build a system that tolerates imperfect movement rather than hoping every unit follows the route you imagined.
Quick answers
Braveward FAQ
What is the first thing to build in Braveward?
The opening guide asks you to build a Warriors Guild beside the castle, wait for it to finish, and then hire a warrior.
Do I control each hero directly?
Heroes choose their own paths. You influence the defense through guilds, recruitment, placement, and bounties.
Why should I keep coins unspent?
A reserve lets you hire from a completed guild or answer a new problem when the next phase begins.
Is Braveward real-time?
The visible phase timer continues while you plan, so preparation decisions must fit within the current part of the day.
Can I play with touch controls?
Yes. The build menus, structures, hiring actions, and map tiles can be selected by tapping.
Game information
Game details
Braveward is provided through the GamePix-hosted player.
- Distributor and host
- GamePix
More about this game
Keep the break going
Similar games
Roll, read, attack
Dice & Slash
Use a visible five-die hand to attack a chapter enemy, then choose a skill after the win.
Put your first axe to work
Wooden Vest
Spin at the roulette, buy the displayed axe, then put it on a stump and watch the wood count rise.