Mirror Puzzle
Place a powder keg during the castle tutorial, then use the visible mirror tool to redirect light.
- Session
- Flexible short sessions
- Controls
- Click a tutorial tool
- Best for
- Strategy
Landscape gives you more room
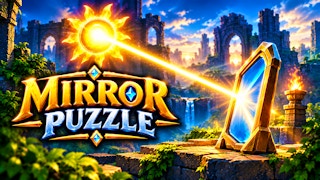
Guide the light beam
Mirror Puzzle
Click a tutorial tool
Play loads a game hosted by GamePix that may show ads and use cookies.
Provided by GamePix. Ads and cookies may load only after you press Play. Read the GamePix Privacy and Cookie Policy.
Open How To Play and enter the castle courtyard tutorial.
How to play
How to Play Mirror Puzzle
Follow the current tutorial prompt and verify that each placement changes the scene.
- 01
From the menu, open How To Play and enter Castle Courtyard Tutorial 1.
- 02
Read the tool counters and select Powder Keg when the prompt asks for it.
- 03
Place the keg near the cracked wall and wait for the counter and beam to change.
- 04
When the tutorial advances to the Mirror step, inspect the visible light path before choosing a placement.
About the game
Mirror Puzzle
Mirror Puzzle opens on a castle-themed menu with Play, Map, and How To Play. How To Play leads into Castle Courtyard Tutorial 1. A cold torch, a light path, a cracked wall, and tool counters were visible. The tutorial first asked us to select the Powder Keg tool, then place it near the cracked wall. A successful placement changes the keg counter from 0/1 to 1/1, changes the light path, and advances to the Mirror tool instruction.
This gives you a clear order for the opening puzzle. The scene is not just an image of a light beam; it is a tool-placement puzzle with a stated order. The wall must be addressed before the later mirror instruction. Look at the numbered tutorial prompt and the counters before placing anything. If the selected tool is wrong or the target spot is not accepted, the prompt and count may not advance. Continue by tracing the new beam route before deciding where a mirror would help.
The opening task teaches a method you can reuse on each light-path scene: read the prompt, inspect the obstacle, and make one purposeful change. Treat the beam, obstacles, available tools, and current objective as separate facts. Your goal is to make one observable change at a time and see whether the interface advances. When the Mirror step appears, follow the controls shown there and compare the incoming ray with the torch or target. Do not assume a mirror placed anywhere along the scene will redirect the beam usefully.
Controls
Controls for Mirror Puzzle
- Click or tap How To Play
- Enter the guided castle courtyard sequence.
- Click or tap a tool icon
- Select the tool named by the current tutorial instruction.
- Click or tap a scene location
- Place the selected tool if that location is accepted.
Useful strategy
Let the light path explain the next move
- Read the numbered step before placing a tool; the opening calls for a keg before a mirror.
- Watch the inventory count as well as the animation to confirm accepted placement.
- Trace where the current beam ends and which obstacle lies between it and the target.
- Avoid repeated clicks on the same spot when the prompt and counter do not change.
Enter the tutorial with a clear objective
The menu offered Play, Map, and How To Play. For a first visit, How To Play is the most useful entry because it labels the immediate tool and objective. In Castle Courtyard Tutorial 1, the torch was cold and the scene showed a cracked wall along the potential light route. The screen also displayed counters for mirror placement and a powder keg. Read that instruction panel before exploring the scene; otherwise a decorative object can look like the target.
A numbered tutorial step is a narrower goal than solving an entire level. The first visible instruction asked for the Powder Keg tool. After selecting it, the next prompt asked us to place the TNT near the cracked wall. That order matters. Trying to place a mirror before the wall is addressed may leave the same obstacle in the beam path, and it would ignore the step the interface is currently checking.
Use the counters to follow progress. Before placing the keg, its display reads 0/1; after an accepted placement it reads 1/1 and the prompt advances. A highlighted icon only means a tool is selected, so look for the scene and counter to change before treating the step as complete. The Mirror prompt then tells you what to inspect next.
Place the keg and inspect the result
Select the Powder Keg icon, then aim near the cracked portion of the wall rather than clicking arbitrary scenery. A valid scene click places a visible object and interacts with the light beam. The counter changed from 0/1 to 1/1, and the tutorial moved to Step 3, Select Mirror tool. Those three pieces of feedback are stronger than the click alone: object placement, resource count, and instruction advance.
If a first click does not appear to work, pause and examine what is selected. Repeated blind clicking can obscure which location actually registered and may spend a limited tool at an unintended spot. Look for a selection cue on the icon, the cracked surface, and the tool count. Move your next attempt only after confirming the current state.
Once the keg interaction changes the scene, redraw the light route mentally. A former wall obstruction may be altered, but the beam still needs a way to reach the intended torch or target. Trace the visible ray from its source to its present endpoint. This gives a reason to select and orient the next tool, rather than placing a mirror solely because the prompt names one. Choose a mirror location from the current ray path and target rather than copying a fixed coordinate.
Reason about mirrors without guessing a solution
The Step 3 instruction introduces the Mirror tool. Before placing it, reason from the visible geometry. Ask where the incoming beam travels, where it needs to go, and which surface could turn that path. A mirror placed outside the beam cannot affect it. A mirror that redirects the ray into another obstacle may not solve the current chamber.
Before committing a mirror, distinguish tool selection from placement. Selecting an icon prepares a tool; the inventory counter and scene change tell you whether it was actually placed. If the game later allows adjustment, rely on the controls shown in that state. Use only the placement or adjustment controls the current screen presents; a selected icon by itself does not show that the ray has turned.
Think in one segment at a time. Start at the beam source and follow the line to its first interruption. The keg event changed that path in the tutorial. Now consider where the beam reaches next and what a mirror would have to do there. This method is more robust than copying a memorized position because a later map can have different obstacles, tool limits, and target locations.
Troubleshoot a placement that does not advance
If the tutorial remains on the same numbered step, first check whether the requested tool is selected. A click on the environment may do nothing when another icon is active. Then check the intended location: the keg instruction specified the cracked wall, not any open tile. Finally watch the counter. If it remains 0/1, the game may not have accepted a placement even if your pointer was near the correct area.
If an object appears but the beam does not obviously reach the torch, wait for the animation and read the new prompt. A successful keg placement advances to Step 3, but the torch may still need its light redirected. A tool can clear one obstacle while leaving another task; use the current instruction and counters to determine what remains.
If the frame is small on your device, enlarge the play area before attempting a precise scene click, then verify the placement afterward. Use the browser or device viewing options available to you; the game may not provide its own zoom control. Keep clicks inside the scene, then read the tool counter and numbered prompt to confirm a placement.
Approach later scenes as new light puzzles
The opening tutorial offers a transferable sequence: read the objective, identify the beam source, inspect obstacles, select the required tool, and verify a visible change. Do not carry a fixed keg or mirror coordinate to another chamber. A later map could rearrange walls, torches, and available tools. What transfers is the method of tracing the light path, not a fixed placement coordinate.
If you feel stuck, separate three possible problems. The tool may be wrong, the placement spot may be invalid, or the light path may still be blocked. The prompt helps with the first, the tool counter helps with the second, and tracing the ray helps with the third. This diagnosis narrows your next action and keeps you from spending limited resources without learning why the scene stayed unchanged.
At the end of a short session, stop at a stable instruction rather than during an animation. If you return at Step 3, read the Mirror prompt, current mirror and keg counts, and present ray path before continuing. The next useful action depends on where the beam now stops and what placement the current scene accepts.
Quick answers
Mirror Puzzle FAQ
How do I know the keg placement worked?
The keg counter changes from 0/1 to 1/1, the scene and beam change, and the prompt advances to Select Mirror tool. Then trace the remaining light route.
Where should the mirror go?
Inspect the beam and destination after clearing the wall, then follow the current Mirror instruction. Place or adjust the tool only using controls visible in your session.
Why did my scene click not work?
Confirm the requested tool is selected and the target location matches the current prompt. A changed scene, inventory count, and numbered step are better feedback than a click alone.
Game information
Game details
This game runs in the official GamePix publisher player. The external game may use cookies or show advertising under GamePix terms.
- Distributor and host
- GamePix
More about this game
Keep the break going