Wall Watch - Hold The Line
Spend the opening 100 gold on a Rifle Post, then reposition it between defensive pads.
- Session
- Flexible short sessions
- Controls
- Click an empty pad to open Requisition
- Best for
- Action
Landscape gives you more room
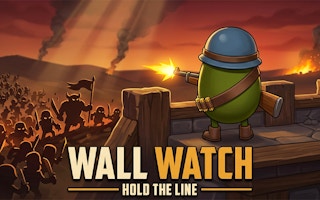
Build the first defense
Wall Watch - Hold The Line
Click an empty pad to open Requisition
Play loads a game hosted by GamePix that may show ads and use cookies.
Provided by GamePix. Ads and cookies may load only after you press Play. Read the GamePix Privacy and Cookie Policy.
Start a New Run and inspect the five lanes and 100 gold.
How to play
How to Play Wall Watch - Hold The Line
Use the first 100 gold on the available post, then inspect its position before advancing the wave.
- 01
Choose New Run and read the gate health, gold, Wave 1/5 label, and five lanes.
- 02
Click the highlighted empty pad to open its Requisition menu.
- 03
Select Rifle Post, verify that gold drops from 100 to 0, and look for the placed unit.
- 04
Drag the unit to another pad if the tutorial asks, then read the next visible instruction.
About the game
Wall Watch - Hold The Line
Wall Watch - Hold The Line opens a defensive run with five visible lanes, a gate at 500/500 health, 100 gold, and a Wave 1/5 indicator. The opening tutorial directs you to an empty pad. Clicking Pad 1 opened a Requisition menu, where Rifle Post cost 100 gold and was the only currently available purchase. Selecting it spends the opening 100 gold and places a visible unit. Dragging the unit from Pad 1 to another empty pad repositions it before the tutorial introduces a grenade instruction.
The first useful choices are buying a defender and deciding where to put it. Other Requisition entries show later wave or level locks in the opening menu, so read the live availability before planning a purchase. Once the tutorial reaches combat abilities, inspect their on-screen target and effect rather than assuming the first post can protect every lane by itself.
The central question is where a limited post should stand relative to the incoming lanes. Before spending gold, read the gate health, wave number, lane layout, and available pads. After placing the Rifle Post, compare its location with the visible approach. The tutorial’s drag step shows that an existing post can be moved to another pad, which may matter more than buying another unavailable unit. Follow the on-screen prompt for later abilities and check their outcome in your own run.
Controls
Controls for Wall Watch - Hold The Line
- Click or tap an empty pad
- Open the Requisition choices for that defensive position.
- Click or tap Rifle Post
- Spend the displayed 100 gold and deploy the available defender.
- Drag an existing post to another pad
- Reposition a deployed defender when the move is accepted.
Useful strategy
Protect the gate with deliberate placement
- Read the Wave and gold counters before opening the purchase menu.
- Do not plan around units that the current menu marks as locked.
- Verify the unit appears and gold changes after a purchase.
- Compare all five lanes before settling a movable post on one pad.
Read the opening battlefield
Choose New Run, then pause on the battlefield before interacting with the highlighted pad. The opening screen shows five parallel lanes, gate health 500/500, 100 gold, and Wave 1/5. These values provide a simple baseline. If gate health falls later, you can compare against the starting total. If gold falls after purchase, you know the transaction registered. The wave label tells you this is the opening phase; expect the available choices to change as the run progresses.
Look at where enemies would approach and where the pads sit relative to those lanes. A defender on the wrong pad may have a different useful area from one near the center. The tutorial asks you to move a placed post, so compare pads before committing to a defensive position. Range and damage should be judged from the current battle display once enemies actually arrive. Your first planning task is to map the available pads against the visible lanes.
Keep separate the game’s instruction and your own speculation. The highlighted Pad 1 invited a click; Requisition then revealed purchasable and locked units. There is no need to guess at a hidden purchase tree when the current menu shows cost and locks. A first-time player can make a good decision by reading the current menu, checking the gold total, and following the current tutorial step.
Buy the first Rifle Post
Click Pad 1 to open Requisition. In the opening menu, Rifle Post costs 100 gold. Other choices had lock labels tied to later progression, including wave or level conditions. That made the practical first purchase straightforward: the available post matched the exact opening budget. Clicking Rifle Post spends the 100 gold and puts the unit on the pad.
Check both signs after buying. The gold change proves the resource was spent; the visible unit proves placement occurred. If the menu closes but neither sign changes, do not assume a purchase succeeded. Reopen the appropriate pad only after the scene settles, and check whether the required tutorial instruction is still active. This avoids accidental repeated input or confusion with a mere menu highlight.
Spending all 100 gold may feel risky, but the opening tutorial’s available selection constrained the choice. Do not extrapolate that every run should always buy the same post first. Later sessions may show different resources, unlocked units, or a different wave. At Wave 1, use the displayed cost and availability to choose; judge combat performance only after watching how the post handles an actual approach.
Reposition a placed defender
After the Rifle Post appeared, the tutorial directed a move. Dragging it from Pad 1 to Pad 2 visibly relocated the unit and advanced the tutorial to a later step. A placed defender can be repositioned between pads during the opening tutorial. For later waves, check whether the game allows a move at that moment before depending on a last-second relocation.
Before moving, identify the destination pad. Drag from the center of the post to a clearly empty pad, release, and wait for it to settle. A successful relocation leaves the unit on the destination pad and advances the tutorial step. If you release between pads and nothing changes, first confirm the unit remains at its old position, then inspect whether the target pad is valid. Avoid claiming success from cursor motion alone.
Use repositioning to respond to information, not as constant activity. If an approaching threat becomes visible in one lane, compare its path with the post’s current location and the available pads. The tutorial move teaches the control, while actual threats should determine the best combat placement. Watch the lane and gate rather than assuming Pad 2 is universally best because it was the tutorial destination.
Interpret later prompts conservatively
The tutorial advanced to a grenade step after the post was moved. That introduces another action; read the prompt before choosing its target and watch what changes after using it. When you reach that prompt, read its current target and control label before using it. A visible grenade icon alone does not explain its damage, timing, or resource cost; read the current instructions and feedback.
Similarly, the Wave 1/5 label describes the displayed opening run. The later waves may present different choices and threats. Later waves could introduce different enemies or unlock new Requisition choices, as the locked menu labels suggest. Use the live wave, gold, and gate readouts to decide what is currently available. An item marked locked is not a near-term tactical option, no matter how appealing its name looks.
To judge whether your defense is working, watch for unit fire, enemies leaving the lane, gate-health changes, and the wave counter advancing. If the gate starts losing health, identify which lane needs coverage before moving a post or spending newly earned gold. The first Rifle Post is an opening tool, not a guarantee that every lane will hold.
Avoid common opening mistakes
One mistake is clicking a pad without reading the Requisition state. The menu may show tempting units that are unavailable. Compare your 100 gold with the price and lock labels before selecting anything. In the opening menu, Rifle Post is the available 100-gold choice. If your current screen differs, use its displayed options rather than following a fixed purchase script.
A second mistake is counting a selected menu card as a deployed unit. The accepted action gave two visible changes: 100 gold became 0, and a Rifle Post appeared on Pad 1. A third mistake is assuming dragging always moved it. Verify its final pad and the tutorial’s progress. These checks are especially useful in a busy defense screen where a small icon could be mistaken for a placed post.
Finally, do not start speculating about a lost run before enemies have arrived. The gate starts at full health. Use that quiet period to read the five-lane layout and learn the purchase and move controls. When the next tutorial step asks for a grenade, read its prompt and observe its outcome in your own session. After that, use the current enemy paths and gate-health changes to decide whether a move or ability is helping.
Quick answers
Wall Watch - Hold The Line FAQ
What can I buy with the opening 100 gold?
In the New Run opening, Rifle Post costs 100 gold and is available. Other choices show wave or level locks; check the live menu before spending.
Can a Rifle Post be moved after buying it?
The opening tutorial lets you drag the placed post from Pad 1 to another pad. Confirm its new position and check whether moving remains available during later waves.
How do I know whether the first post is covering the right lane?
Watch the incoming path, post activity, and gate health once the wave begins. If enemies pass through an uncovered lane, consider a better pad or a newly available tool.
Game information
Game details
This game runs in the official GamePix publisher player. The external game may use cookies or show advertising under GamePix terms.
- Distributor and host
- GamePix
More about this game
Keep the break going
Similar games

Guard the Heart Tree
Briarlight Defense
Place forest towers before the wave and watch which lane the enemies take.
Choose a card and a lane
Mech Battle Arena
Play ETH Games’ robot card battle: drag an affordable card onto your half and watch the robot advance toward a bridge.