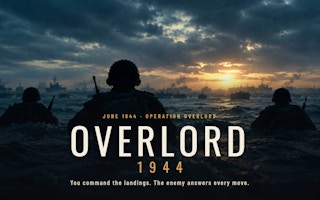
Overlord 1944
Read the situation report, choose a strategic priority, and inspect the consequences.
- Session
- Flexible short sessions
- Controls
- Click or tap a displayed campaign decision
- Best for
- Story
Choose the landing plan
Overlord 1944
Click or tap a displayed campaign decision
Play loads a game hosted by GamePix that may show ads and use cookies.
Provided by GamePix. Ads and cookies may load only after you press Play. Read the GamePix Privacy and Cookie Policy.
Read the situation report and all available choices.
How to play
How to Play Overlord 1944
Use the report and consequence panels to make and review each decision.
- 01
Begin the campaign and read the opening situation report before selecting an option.
- 02
Compare the three priorities and the risk text attached to each choice.
- 03
Select one option and wait for the Decision Taken result.
- 04
Read the counter-move and What Has Changed panel before continuing to the next scene.
About the game
Overlord 1944
Overlord 1944 is a text-led campaign game about choosing priorities under uncertainty. Its opening places you in a May 1944 planning room and offers three competing first-day approaches: push for Caen, connect the five beaches, or drive toward the Cotentin and Cherbourg. The screen puts the situation report above the choices and attaches a consequence note to each option. This is a game decision, not a quiz that asks you to recall an exact historical answer.
Selecting the option to join the five beaches first moves to a Decision Taken screen. It explains the chosen plan, describes an opposing counter-move, and shows a What Has Changed panel. In that result, supply rises by three, while cohesion rises at Utah, Omaha, Gold, Juno, and Sword by different amounts. German alert is displayed as unconfirmed. Those changes make the interaction observable: the choice affects a set of game variables. The counter-move text also makes clear that the opposing side is part of the simulation, so the visible numbers should be read beside the narrative, not in isolation.
The most useful way to play is to treat each passage as a decision brief. Read the current location and date, the report, the listed alternatives, and any highlighted risk. Choose the objective you value most, then inspect what actually changed before moving forward. A favorable number in one area can coexist with a cost elsewhere. Avoid assuming a fixed optimal route from one opening choice; use the game’s own result panels to revise your understanding as the campaign continues.
Controls
Controls for Overlord 1944
- Click or tap a decision card
- Commit to the displayed strategic option for the current scene.
- Situation button
- Review the game’s current situation when the control is available.
- Log button
- Review the sequence of recorded campaign events when the control is available.
Useful strategy
Read before choosing
- Name the objective of each option in plain words before focusing on its dramatic description.
- Read any red or emphasized risk line as part of the tradeoff, not as decoration.
- After a choice, compare supply, beach cohesion, and uncertain information separately.
- Treat unconfirmed enemy information as uncertainty rather than an exact value.
- Use the current result panel to guide the next decision; do not assume every run follows one script.
Turn the opening report into a decision
The first campaign screen contains more than a story introduction. It states a problem: the landing force has several beaches and must decide where the initial weight goes. The situation report presents three concerns. One voice emphasizes Caen and the eastern road junction, another warns about the need for a working port, and a third worries that separate beachheads can be handled one at a time. These are competing priorities for your first choice.
Before clicking, translate each option into its central goal. Caen on the first day favors an eastern push. Joining the five beaches favors a connected front. Moving toward the Cotentin and Cherbourg favors a port-oriented western objective. This simple comparison is more useful than trying to predict every future event from the prose. Each card also carries its own explanation or risk line. Read those lines because a bold plan may expose another area of the front.
The opening text frames the enemy response as reactive. You do not need to know an invisible formula to play, but you should expect your decision to have consequences beyond one number. Choose the plan whose immediate tradeoff you understand best. If you value cohesion and supply, the connected-beaches option is a clear example to inspect. If you choose another route, judge it by the result the game shows, not by an assumed historical verdict.
Read a Decision Taken screen carefully
A choice is not complete when the card disappears. The following screen summarizes the order you gave, describes an opposing counter-move, and lists changes. After selecting Join the five beaches first, the result reports an increase in supply and cohesion across Utah, Omaha, Gold, Juno, and Sword. The individual cohesion values differ, so a single summary such as “everything improved” would hide information. Read each line as a separate effect.
The opposing response is presented as narrative information, not a neat resource bar. In this opening result, the German counter-move discusses reserves and command. The What Has Changed panel then marks German alert as unconfirmed. That label matters: it means you do not have a verified numerical estimate for that field. Do not fill the gap with a guessed enemy strength. The game invites you to plan with imperfect information.
After reading the result, ask whether the change supports the goal you had when choosing. If you wanted a connected landing, improved cohesion at multiple beaches is relevant. If you were primarily concerned about a port, the same result may leave that problem unresolved. The point is not to declare a choice universally good or bad after one scene. It is to learn how the game expresses consequences and carry that information into the next decision.
Compare resources without flattening them
Supply and cohesion answer different questions. Supply concerns whether the campaign can support its operations; cohesion tells you how well specific beach sectors hold together in the game’s model. One can rise while another remains strained. When a result lists several beach values, scan for the lowest or most vulnerable area instead of only celebrating the total number of green changes.
The opening choice to connect beaches provides a good reading exercise. The result shows supply plus three and different cohesion gains for each named beach. It would be a mistake to treat all five as identical, even though they improved together. A later scene may make one sector more important than another. Keep a mental note of which objective your choice helped and which objective you postponed. That is enough to make the next report meaningful.
Uncertain fields need their own category. An alert marked unconfirmed is not zero and not a hidden promise that the enemy will be passive. It is a cue to avoid overconfidence. If you use the Situation or Log controls, compare what those screens actually show with the result panel. Do not assume they reveal complete enemy plans. In a decision game, distinguishing a known resource change from an uncertain opponent can be more valuable than memorizing every sentence.
Handle branching narrative choices
The game’s prose can make one option sound urgent, especially when it names a city or a deadline. Pause and locate the mechanical question beneath the language. Is the choice about an immediate breakthrough, a connected front, or a supply route? Identify the desired benefit and the exposed risk. This gives you a reason for the click and a standard for reviewing the outcome.
After each selection, read the new scene from the top. The date, location, and heading tell you what stage of the campaign you are considering. A result panel belongs to the prior choice; a new situation report introduces the next problem. Mixing these two can lead to a poor decision, as you may answer an old concern rather than the current one. Use the Log if you need to recall what you previously ordered.
Do not assume the game is a documentary or a source for historical facts outside its own narrative. Its displayed estimates, resource changes, and opposing response are part of the playable model. A good player-facing question is “what does this screen say my choice changed?” rather than “what happened in every real campaign?” That keeps your decisions grounded in the interface you can actually use.
Recover when a plan disappoints
If a decision leads to an unwelcome result, separate the expectation from the evidence. What benefit did you hope for? Which panel value changed differently? Did the counter-move introduce a risk you ignored? This short review helps you learn the game’s priorities without pretending that every future branch is predictable. A weak result can still show how one resource or sector responds to a particular strategy.
If the text feels dense, read it in layers. First locate the choice heading, then scan the situation bullet points, then read only the consequence line for each option. Make a provisional choice and finally read the surrounding prose for context. This method preserves the story while preventing a long paragraph from hiding the actual decision. On the result screen, read numerical changes before interpreting the narrative tone.
Continue only after you can summarize the outcome in one sentence. For the observed connected-beaches choice, a fair summary is that supply and all five listed cohesion values increased, while enemy alert remained unconfirmed. That is specific enough to guide another move and modest enough to avoid claiming a guaranteed campaign win. Use the same discipline for later scenes: choose, observe, compare, and update your plan.
Quick answers
Overlord 1944 FAQ
Is there one correct opening plan?
The opening presents different goals and risks. Choose a priority, then judge it by the Decision Taken changes rather than assuming one universally correct route.
What does unconfirmed enemy alert mean?
The result does not provide a confirmed value for that field. Treat it as uncertain information, not a zero or a prediction.
Where can I check what changed?
Read the What Has Changed panel after a decision. The observed connected-beaches result listed supply and beach-cohesion changes.
Game information
Game details
This game runs in the official GamePix publisher player. The external game may use cookies or show advertising under GamePix terms.
- Distributor and host
- GamePix
More about this game
Keep the break going