Geometry Vibes
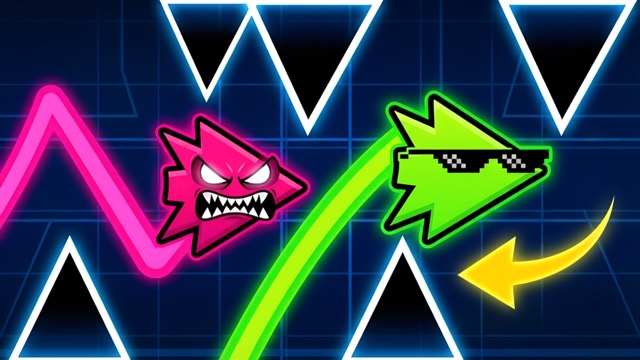
Guide a moving arrow through spike-lined passages by balancing short rises and controlled descents.
- Session
- 1–5 min
- Controls
- Hold left mouse button or Up Arrow to rise
- Best for
- Quick
Landscape gives you more room
Geometry Vibes
Geometry Vibes
Hold left mouse button or Up Arrow to rise
Play loads a game hosted by Playgama that may show ads and use cookies.
Provided by Playgama. Ads and cookies may load only after you press Play. Read the Playgama Privacy and Cookie Policy.
Guide a moving arrow through spike-lined passages by balancing short rises and controlled descents.
How to play
How to Play Geometry Vibes
Hold to move the arrow upward, release to send it downward, and keep alternating at the right moments to avoid every obstacle in the route.
- 01
Choose a solo or multiplayer option and identify your arrow. In multiplayer, pause at the setup screen until every player has matched their position with the displayed key prompt.
- 02
Hold the left mouse button or Up arrow in the main control scheme to climb. Release the input to descend rather than waiting until the arrow reaches the top boundary.
- 03
Look past the arrow toward the next opening. Decide whether the center of that gap requires a climb, descent, or nearly level pulse before making the input.
- 04
Use short presses and releases for narrow corrections. Save longer holds for clear vertical travel when the next obstacle leaves enough room to reverse direction.
- 05
After passing a hazard, move toward a neutral part of the corridor that preserves both upward and downward options for the next shape.
- 06
When a run ends, remember the first timing decision that made the collision difficult to avoid, then adjust that hold or release point on the next attempt.
About the game
Guide an arrow through hazards with one control rhythm
Geometry Vibes by gameVgames is a reaction arcade game about keeping an arrow inside a route filled with obstacles, traps, and spikes. Hold the active input to rise and release it to descend. That simple relationship controls every correction, so survival depends on when you change direction rather than how many different buttons you press.
The route arrives continuously. A long hold creates a committed climb, while a quick press produces a smaller adjustment. Releasing has the same timing problem in reverse: descend too early and you meet the lower boundary; wait too long and the arrow reaches the upper hazards before the fall can recover it.
Solo play rewards calm previewing and repeatable input lengths. The game also lists two-, three-, and four-player modes, where several people compete at once. Multiplayer key assignments can vary by the mode or screen, so each player should follow the control legend displayed inside the game before the round begins.
Controls
Controls for Geometry Vibes
- Hold left mouse button or Up arrow
- Move the arrow upward in the main control scheme.
- Release the active input
- Move the arrow downward.
- Multiplayer
- Use the player-specific keys shown on the current setup screen.
Useful strategy
Aim for the middle of the next safe opening
- Watch the gap ahead instead of the arrow tip. The arrow's current height matters, but the opening tells you when the next direction change must begin.
- Use short pulses near spikes. Long holds create more vertical movement and leave less room to reverse before the opposite boundary arrives.
- Exit each obstacle near a usable center line. Passing at the extreme top or bottom can turn the next easy gap into an emergency correction.
- Release slightly before reaching the desired peak. The direction change needs room to shape the next descent, especially after a sustained climb.
- When two hazards form a zigzag, plan both turns before entering the first gap. A perfect first pass can still fail if it leaves the arrow moving away from the second opening.
- In multiplayer, confirm controls before competing and keep attention on your own arrow. Nearby players are useful references, but copying their timing ignores your different height.
Read the next opening before changing direction
Treat each obstacle as an approach, center, and exit. On the approach, locate the middle of the usable gap. At the center, use the smallest input needed to remain inside it. At the exit, check where the following obstacle begins before allowing the arrow to continue rising or falling.
The closest wall can dominate your attention, but the next gap decides the correct line. Shift your gaze slightly forward while keeping the arrow in peripheral view. This gives you time to begin a climb or descent gradually instead of making a large correction at the edge of the obstacle.
When a shape is difficult to read, choose the widest visible safe region and approach it with a short input. Refine the line as more of the route enters view. Two measured changes are easier to recover from than one long hold based on incomplete information.
Use input length to control vertical distance
A quick press changes the trajectory without demanding much recovery space. A sustained hold moves the arrow farther upward and requires an earlier release. Practice distinguishing a tap, a short hold, and a committed climb. Those three useful scales cover more situations than frantic repeated clicking.
Descending also has length. Every moment you remain released carries the arrow downward, so resume the input before the lower boundary becomes urgent. Think in paired actions: hold and release, or release and hold. The second half should already have room when you begin the first.
Avoid correcting every tiny visual wobble. Extra inputs can amplify movement and break a stable line. If the arrow is already headed through the middle of a broad gap, let the current trajectory work and save attention for the next obstacle.
Prepare the reversal before the peak or trough
The safest place to reverse is rarely the absolute edge of the corridor. Release before the arrow reaches the intended highest point so it begins descending with margin above. Resume the hold before reaching the intended lowest point for the same reason. Margin turns timing errors into small deviations instead of collisions.
For an up-then-down zigzag, inspect the second gap while climbing through the first. If the next opening sits low, stop the climb as soon as the first obstacle is cleared. Continuing upward because the current space looks safe steals the descent distance needed moments later.
Use obstacle exits as timing markers. Rather than counting a fixed beat that may not fit every section, connect the reversal to a visible event: the arrow tip clears a corner, enters the center of a gap, or passes the final spike. Visual markers adapt to changing layouts.
Recover a flexible line after a narrow escape
A close pass often leaves the arrow near the top or bottom and still moving toward danger. First reverse enough to stop the drift, then aim for open space rather than forcing an immediate return to the exact center. Recovery happens in stages when the corridor is tight.
Do not repeat the input that caused the emergency just because the next obstacle appears similar. Check the current height and direction first. Two visually identical gaps require different timing when one begins from a climb and the other from a descent.
When the route briefly opens, use that space to rebuild balance. Settle near a middle band and reduce rapid pulsing so the next hazard starts from a readable state. Open sections are preparation zones, not invitations to make unnecessary vertical swings.
Quick answers
Geometry Vibes FAQ
How do you control the arrow in Geometry Vibes?
Press and hold to send the arrow upward, then let go to bring it downward. The main scheme lists the left mouse button or Up arrow; use short changes for precise corrections.
What is the goal in Geometry Vibes?
Keep the arrow inside the route and avoid obstacles, traps, and spikes for as long as the current run continues. Read the next safe opening before changing direction.
How do I avoid overcorrecting?
Use shorter holds and releases near hazards, and stop adding inputs when the arrow already has a safe line. Begin each reversal before reaching the corridor edge.
Can two, three, or four people play Geometry Vibes?
Yes. The game lists multiplayer options for two to four players. Follow the player-specific key prompts shown on the current setup screen before starting.
Why should I aim for the middle of a gap?
A centered pass leaves room to adjust upward or downward for the next obstacle. Clearing at an extreme edge reduces recovery space and can force an immediate reversal.
What should I change after a collision?
Recall the first hold or release that removed your safe line. On the next attempt, change that timing point slightly and keep the approach consistent enough to compare the result.
Game information
Game details
Geometry Vibes is developed by gameVgames and provided through the Playgama-hosted player. The external player may display advertising and is governed by Playgama's privacy terms.
- Developer
- gameVgames
- Distributor and host
- Playgama
More about this game
Keep the break going